
Getting Started with OmniVista Cirrus
To get started with OmniVista Cirrus, you initially create a Freemium account - a free account that provides an inventory of network devices and allows one firmware upgrade on devices in your network. After creating a Freemium account, you can upgrade to a Paid account, which provides full management for the subscribed number of devices and services for the length of the contract.
Prerequisites
There are certain prerequisites that you must verify/configure on your local network (e.g., DCHP Server, Firewall, NTP Server) and devices (e.g., OS release) before getting started.
Creating a Freemium Account
Follow the steps below to create a Freemium account. The steps must be performed in order.
- Creating the Account
- Adding Devices to the Device Catalog
- Starting the Activation Process on Devices
Creating The Account
Follow the steps below to create a Freemium account.
1. Go to the OV Registration Portal.
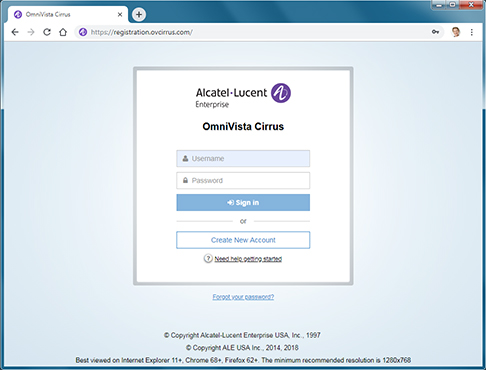
2. Click on the Create a New Account button. The Create New Account Screen will appear.
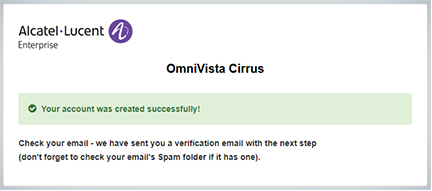
3. Complete the fields. Fields marked with an asterisk (*) are required. At the bottom of each screen, click Continue to move to the next screen. Note that the username you enter will be used to log into OmniVista Cirrus once your account is created. Also note that the e-mail address you enter will be used to verify your account and complete the process. When you have completed and reviewed all of the fields, accept the terms and conditions and click on the Create Account button. A Confirmation Screen will appear.
4. Go to the e-mail account you entered in Step 3 above. You will receive an e-mail from ALE USA Inc (noreply@ovcirrus.com) containing instructions and a verification link. Click on the Go to Verify Account link. The Set Password Screen will appear.
Important Note: There is a link in the body of the email to download the required device OS software for OmniVista Cirrus. Devices must be running a minimum software version to connect to OmniVista Cirrus. Click on the link to download the software. If necessary, you can use this software to upgrade your devices. See Device Prerequisites for more information.
5. Create and confirm your password, then click on the Save button. The Confirmation Screen below will appear.

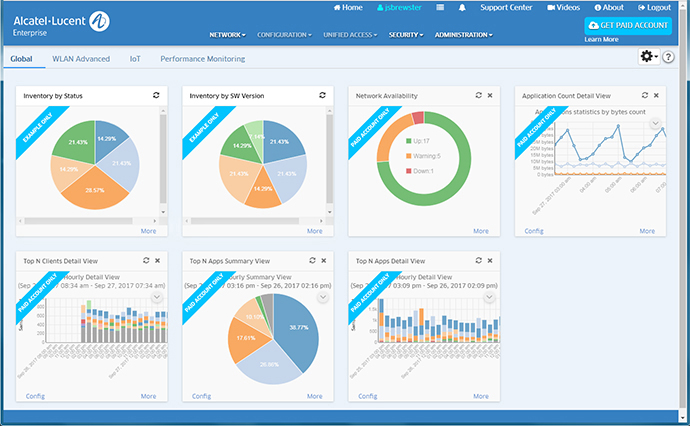
6. Click on the Continue to Login Page link and log into OmniVista Cirrus using the username and password you created. After successful login, the OmniVista Cirrus Freemium Dashboard will appear.
Note: You will continue to log into https://registration.ovcirrus.com using the username and password you created to access your OmniVista Cirrus Freemium Account.
Adding Devices to the Device Catalog
Before adding a device, make sure the device is running the required software version for OmniVista Cirrus. LAN devices must be running at least a minimum software version of AOS 6.7.2.112.R03 or 8.4.1.R03. APs must be running at least a minimum software version of AWOS 3.0.2.40. Click here for more information on required device software.
To add devices, go to the Device Catalog application, shown below, (Network - Inventory - Device Catalog) to add devices. When you add a device, the device serial number is sent to the OmniVista Cirrus Server for validation. There are several ways to add a device: click on the Add icon to add devices one-at-a-time, click on the Import button to import a .csv file containing a list of devices, or use the OmniVista Cirrus Scanning App.
For detailed instructions on adding devices, click on the help link (?) on the Device Catalog Screen to bring up the Device Catalog online help.
Note: You must add at least one valid device to the Device Catalog to upgrade to a Paid account. If you are planning on immediately upgrading to a Paid account, it is recommended that you add only one device in your Freemium account, and add any additional devices after upgrading to streamline the process.
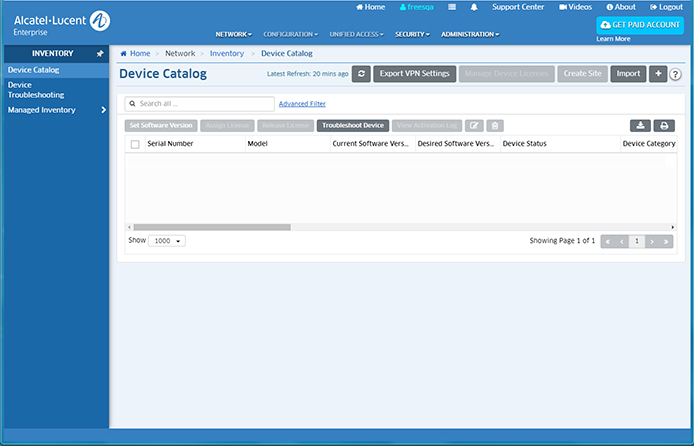
When a device is successfully validated, the Device Status column in the Device Catalog will indicate "Waiting for First Contact". (For a Virtual Chassis, status is displayed in the VC Device Status column.) If you have trouble adding devices to the Device Catalog, click here for common problems and troubleshooting tips.
Automatic Call Home Feature
LAN Devices running AOS 6.7.2.R04 (and later) or AOS 8.5R2 (and later), and APs running AWOS 3.0.4 MR1 (and later) support the Automatic Call Home Feature. These devices automatically contact the OmniVista Cirrus Server at regular intervals. For these devices, there is no need to manually start or restart the activation process. The devices will automatically contact the OmniVista Server at the configured Call Home interval.
Starting the Activation Process on Devices
A device must connect to the OmniVista Cirrus Server to complete the activation process. If it is an unconfigured device (a new device, or an old device that has been reset to the factory default configuration), or a device that supports the Automatic Call Home Feature, just connect the device to your network. Otherwise, connect the device to your network (if necessary) and restart the activation process on the device.
Connecting Devices to Your Network
Connect the device to your network and power it on. The device will automatically contact the OmniVista Cirrus Server and complete the activation process, if the Network and Device Prerequisites are met.
Restarting the Activation Process
If the device supports the Automatic Call Home Feature, the device will automatically retry the activation process. Otherwise, restart the activation process on the LAN device or AP as described below.
- LAN Device - Use one of the following options:
- Manually Reboot the Device - Power on and power off the device.
- Restart the Cloud Agent on the Device - Telnet to the device and disable the Cloud Agent using the following command: cloud-agent admin-state disable force (enter y at the confirmation prompt). Then enable the Cloud Agent using the following command: cloud-agent admin-state enable.
- AP - Use one of the following options:
- Manually Reboot the AP - Power on and power off the AP.
- SSH to the AP and Reboot the AP - SSH to the AP and execute the "reboot" command.
- Use the Express UI to Reboot APs - Click on the "reboot" link next to each AP you want to reboot.
When the activation process completes, the Device Status column will display "Registered". If you have trouble activating devices, click here for common problems and troubleshooting tips.
Troubleshooting
If you encounter problems adding devices, the Device Status column in the Device Catalog can be used to troubleshoot the problem. (For a Virtual Chassis, status is displayed in the VC Device Status column.)
Status |
Resolution |
Unsupported Device Model |
|
Device Validation Failed |
|
Waiting for First Contact |
|
Any Other Status |
|
Network and Device Prerequisites
The following prerequisites must be verified/configured before using OmniVista Cirrus.
Customer Network Prerequisites
The following Network Deployment, Bandwidth, Proxy, Firewall, and NTP Server configurations must be verified/configured on your local network before using OmniVista Cirrus.
Network Deployment
The following sections detail DHCP Network and Static Network deployment prerequisites.
DHCP Deployment Requirements
Standard Requirements
- IP Address - DHCP Server IP address.
- Option 1 - Subnet Mask.
- Option 2 - Gateway.
- Option 6 - Domain Name Servers - Required for FQDN resolution of OmniVista Cirrus connection points.
- Option 28 - Broadcast Address. This option is only recommended, not required.
- Option 42 - NTP Server(s) - Required for Certificate validation (start date and duration), and all related encryption functions. This option is not required on devices running AOS 6.7.2 R04 / AOS 8.5R2 / AWOS 3.0.4.1036 or higher. It is however, recommended.
ALE Specific Requirements
- Option 43
- Sub-Option 1 - Vendor ID. Validate the DHCP response (must be set with the value alenterprise). This sub-option is only required if you specify any of the sub-options listed below, or any devices on your network are running AOS 6.7.2 R03.
The following Sub-Options are only required if you are using a Proxy to connect to the Internet.
- Sub-Option 129 - Proxy URL. It can be either an IP address or a URL (e.g., "IP-address=4.4.4.4", "URL=http://server.name").
- Sub-Option 130 - Proxy Port.
- Sub-Option 131 - Proxy User Name. If the customer proxy access requires authentication, both 131 and 132 can be supplied via these sub-options.
- Sub-Option 132 - Proxy Password.
- Sub-Option 133 - Network ID.
- Option 138 - Remove any existing configuration (required for all ALE Devices).
Static Deployment Requirements
The following switch configuration prerequisites must be met for a Static Network Deployment.
1. Execute the following CLI commands on each switch. The commands can be contained in a CLI Script and pushed to network switches. See the CLI Scripting online help for more information.
ip name-server <dns_ip>
ip domain-lookup
ntp server <ntp_ip>
ntp client enable
2. (If you are using a Proxy), modify the <running directory>/cloudagent.cfg file on each switch as follows:
- Activation Server URL: Enter the Activation Server FQDN.
- HTTP Proxy Server: Enter the Proxy IP address.
- HTTP Proxy Port: Enter the Proxy IP port.
- HTTP Proxy User Name: Enter the Proxy username.
- HTTP Proxy Password: Enter the Proxy password.
3. Enable the Cloud Agent on each switch with the following CLI Command:
cloud-agent admin-state enable
Bandwidth Requirements
Onboarding
For basic onboarding of devices and connection to the OmniVista Cirrus Server, a minimum of 10 kbps end-to-end network throughput is required between the device and OmniVista Cirrus.
Advanced Management
To enable statistics data transfer, status queries, configuration commands, and other requests/responses between devices and OmniVista Cirrus, a minimum of 64 kbps end-to-end network throughput is required between the device and OmniVista Cirrus. APs must be running the latest AWOS software version.
Proxy Requirements
If a device is accessing the Internet via an HTTP/HTTPs proxy, the proxy server must be specified in DHCP Option 43, Sub-option 129 (Server) and Sub-Option 130 (Port). The server may be specified in 1 of 2 formats: 1) “URL=http://server.domain”, or 2) “IP-address=8.8.8.8”. The port is specified as a number (8080).
Firewall Requirements
The following ports must be configured to allow outbound traffic from your local network:
- 443 - If you are not using a Proxy to connect to the Internet, your firewall must allow outbound access to this port; if you are using a Proxy, you need to be able to access this port via your local proxy.
- 80 - Relevant only if you are accessing UPAM Guest/BYOD Captive portal via insecure HTTP. If you are not using a Proxy to connect to the Internet, your firewall must allow outbound access to this port; if you are using a proxy, you need to be able to access this port via your local proxy.
- 123 - Relevant if you are using an NTP Server that is outside of your network. You must ensure that your firewall allows outbound access to port 123 udp. This access cannot be mediated by a proxy, it must be direct (NAT is allowed).
- 53 - Relevant if you are using a DNS Server that is outside of your network.You must ensure that your firewall allows outbound access to both port 53 tcp and port 53 udp. This access cannot be mediated by a proxy, it must be direct (NAT is allowed).
NTP Server Requirements
An NTP Server(s) is required for Certificate validation (start date and duration), and all related encryption functions. Devices must have access to at least one NTP Server, whether local or external. Note that if a device's System Time is not correct, it may take several attempts to synchronize with the NTP Server before the device connects to the OmniVista Cirrus Server.
Device Prerequisites
The minimum device software versions for onboarding and management are detailed below. The minimum onboarding versions are required for the device to connect the to the OmniVista Cirrus Server. The specified management software versions are required to support all of the management features available in OmniVista Cirrus 4.6.1.
Onboarding
For onboarding (call home and connection to the OmniVista Cirrus Server), devices must be running the following minimum software versions:
- AOS 6.7.2.R05
- AOS 8.5R2
- AWOS 3.0.5.xx.
Management
Devices must be running the software versions specified below to support all of the features available in OmniVista Cirrus 3.1.0.
- Essential Switch (E) - OS6350/OS6450 - (6.7.2.R06), OS6465 (8.6R1), OS6560 (8.6R1)
- Core Switch (C) - OS6900 (8.5R4)
- Advanced Switch (A) - OS6860/OS6860E/OS6865 (8.6R1)
- Stellar AP (SA) - OAW-AP1101, OAW-1201, OAW-1201H, OAW-AP1221, OAW-AP1222, OAW-AP1231, OAW-AP1232, OAW-AP1251 (AWOS 3.0.5.xx GA/MR Releases and AWOS 3.0.6.xx GA/MR Releases)
A link to the latest software images is included in the Verification E-Mail you receive when you create your account. If necessary, click on the link and download the required AOS software. Release Notes, containing detailed upgrade instructions for each device type, are available on the ALE Business Portal.